
How to Use Codex CLI with Ace Data Cloud in Your Terminal
A practical beginner's guide to configuring Codex CLI with a Responses-compatible provider.
If you like the idea of an AI coding agent but do not want to leave the terminal, this guide walks through a practical Codex CLI setup using Ace Data Cloud as the OpenAI Responses-compatible provider.
Why this setup is useful
Codex CLI is useful because it stays close to the place where many builders already work: the project directory, the shell, and the files that need to change. Instead of copying errors into a chat window, you can ask Codex to inspect a repository, explain structure, modify files, run commands, and help with everyday development tasks from the terminal.
The small but important configuration detail is that Codex CLI supports custom model providers. In this setup, Codex keeps its native terminal workflow, while requests go to Ace Data Cloud through an OpenAI Responses-compatible endpoint.
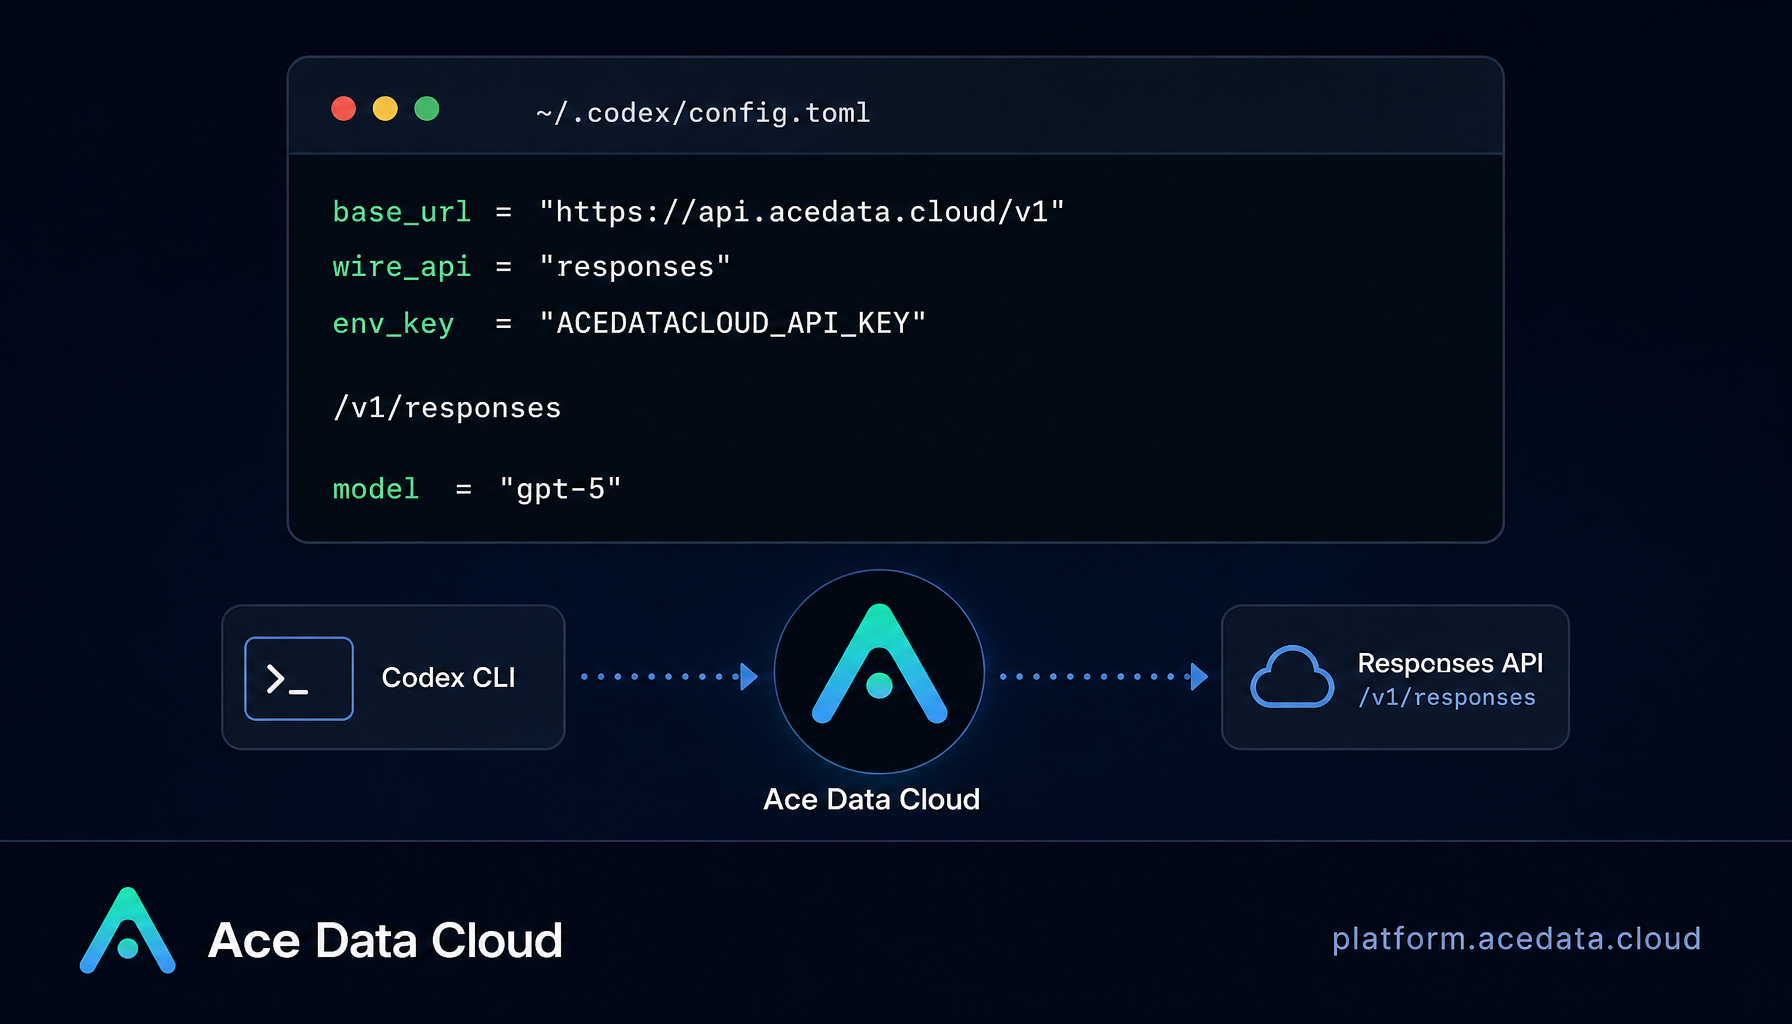
The documented base_url is https://api.acedata.cloud/v1. Codex then uses the Responses protocol, so requests are sent to base_url + /responses, which resolves to https://api.acedata.cloud/v1/responses.
That means there is no local proxy to run and no extra plugin layer to maintain. You are mainly changing provider configuration and where Codex reads the API token.
Install Codex CLI
Codex CLI supports macOS, Linux, Windows, and WSL. If you already have Node.js 18 or higher, the npm path is the most direct:
npm install -g @openai/codex
On macOS, Homebrew is also supported:
brew install --cask codex
After installing, reopen your terminal and verify that the command is available:
codex --version
If you see command not found, do not debug the provider configuration yet. First make sure the install location is on your shell PATH, then open a fresh terminal and try the version command again.
Add your API token to the shell
Codex needs a token, but it should not be hard-coded directly into the config file. The documented setup uses an environment variable named ACEDATACLOUD_API_KEY.
Add this to your shell profile, such as ~/.zshrc, ~/.bashrc, or ~/.bash_profile:
export ACEDATACLOUD_API_KEY="{token}"
Replace {token} with the API token from your Ace Data Cloud application. Then reload your shell profile:
source ~/.zshrc
Use the file that matches your shell. For example, if you added the variable to ~/.bashrc, source that file instead.
Configure Codex to use Ace Data Cloud
Codex reads its global settings from:
~/.codex/config.toml
Create the file if it does not exist:
mkdir -p ~/.codex
touch ~/.codex/config.toml
Then add the provider configuration:
model_provider = "acedatacloud"
model = "gpt-5"
model_reasoning_effort = "high"

[model_providers.acedatacloud]
name = "Ace Data Cloud"
base_url = "https://api.acedata.cloud/v1"
env_key = "ACEDATACLOUD_API_KEY"
wire_api = "responses"
The important fields are straightforward:
model_providerselects the provider block Codex should use by default.modelsets the default model ID, heregpt-5.model_reasoning_effortcan use common values such aslow,medium, orhigh.base_urlpoints Codex at Ace Data Cloud's OpenAI-compatible API base.env_keytells Codex which environment variable contains the token.wire_api = "responses"tells Codex to use the Responses API protocol.
This is the part I like about the setup: the change is explicit and reversible. Your project does not need a wrapper script, and your token stays in your shell environment instead of being copied into every repository.
Clear old login state if needed
If you previously logged into Codex CLI with an official OpenAI account, your machine may have cached that login under ~/.codex/auth.json. Before switching providers, clear it:
codex logout
If that command is unavailable, the documented fallback is:
rm -f ~/.codex/auth.json
If you have never logged into Codex before, you can skip this step.
Start a terminal session
Move into a project and start Codex:
cd /path/to/your/project
codex
A simple first prompt is often better than a huge instruction. For example:
Explain the directory structure of this project
Once the session starts, check the active model and provider:
/model
A working setup should show something like:
Model: gpt-5
Provider: acedatacloud
If the provider is not acedatacloud, recheck two things first: whether ~/.codex/config.toml was saved correctly, and whether ACEDATACLOUD_API_KEY is visible in the same terminal session where you run codex.
Use trust levels intentionally
Codex can read files, execute commands, and make edits, so trust settings matter. For a repository you know well, you can mark a path as trusted:
[projects."/path/to/trusted/project"]
trust_level = "trusted"

[projects."/path/to/untrusted/project"]
trust_level = "untrusted"
I would keep unfamiliar repositories untrusted until you understand what commands the agent may run and what files it may touch. This is less exciting than model selection, but it is the kind of detail that prevents a helpful tool from becoming a risky one.
A practical way to think about the workflow
The request path is simple: Codex reads ~/.codex/config.toml, loads the acedatacloud provider, reads ACEDATACLOUD_API_KEY, and sends traffic through the Responses API. Ace Data Cloud verifies the token, routes the model request, and records usage.
For me, the value of this setup is not that it changes how Codex feels. It is that it does not. You still type codex, stay inside your terminal, and keep the same builder workflow while making the provider layer explicit.
If you want the original reference while setting it up, keep the Ace Data Cloud Codex CLI terminal guide open: https://platform.acedata.cloud/documents/codex-terminal-integration